Step 1: Make a program
In the admin menu: Catalogue, then Passes & Packages
On Passes & Packages, click "Programs", then "New program". Fill in "Name" (the "Slug" fills itself in) and click "Add Program". The name is what visitors read, in your menu and on the page.
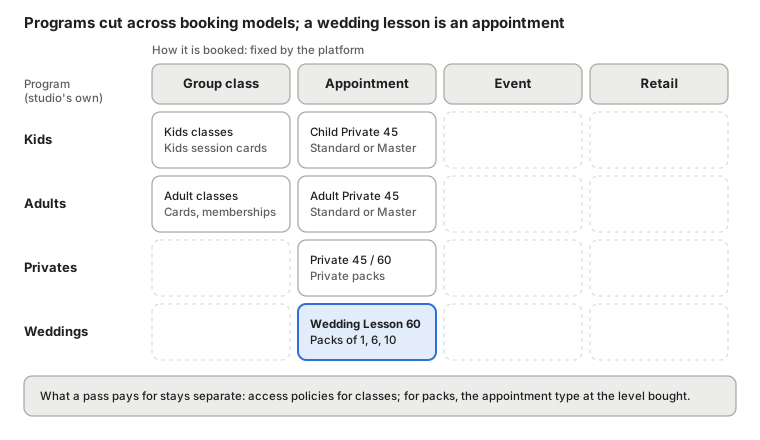
A program is a label: it groups things for your visitors and never changes what a pass covers.
Read Organise your classes by style, level and programStep 2: File what belongs in it
In the admin menu: Catalogue, then Passes & Packages
Open Programs, click the program, then "Add existing...". Tick the class types, passes, appointment types and events that belong and click "File". Something can be in one program at a time: a row that names another program moves out of it. "Remove" unfiles one. Filing never changes what a pass covers or what it costs. You can also choose the program in the "Program" field when you edit one item.
What you file shows under the program's pill on your Prices and Schedule pages and on the program's own page: class cards, memberships, private lesson packs, class types and events. Something in no program is listed on the full Prices and Schedule pages only.
Step 3: File a repeating event
In the admin menu: Schedule, then Events
Open the event and choose its program in "Filed under program". Every date of a repeating event is filed with it, including dates not on the calendar yet. Change it later and the upcoming dates move with it, except a date you filed on its own from Programs. Past dates keep the program they had.
Step 4: Give the program a page
In the admin menu: Catalogue, then Passes & Packages
Open the program and type a name for its page in "Page", then click "Save Changes". The program now has its own page at /programs/ and its slug, and a link to it in your site menu under the program's name, right after Home.
The page lists everything filed in the program that you sell online: private lesson packs with their prices, ready to buy, class cards and memberships, the class types with a link to the schedule, and upcoming events.
Step 5: Write the top of the page
In the admin menu: Website, then Site Editor
The program's page is in the site editor's page list, under the program's name. Whatever you write and publish there shows above the list of what the program sells. With nothing written yet, the page shows the program's name and its list.
Read Edit the pages of your websiteStep 6: Old addresses keep working
If your site had its own Adults, Kids or Weddings page before programs, that page is now the page of a program of the same name, with what you wrote on it kept. Its old address sends visitors, and Google, straight to the new one, so links on flyers and other websites keep working.
To take a program page down, switch off "Active" on the program. The menu link goes, and the page tells visitors it is no longer there. Everything in the program stays on sale.